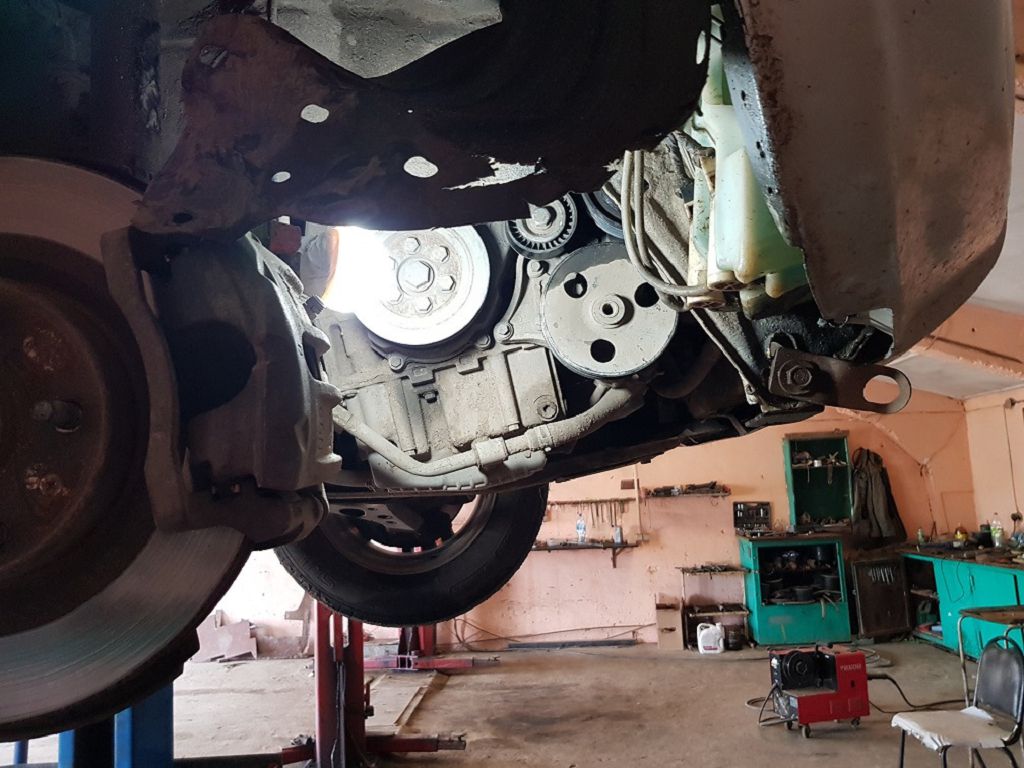
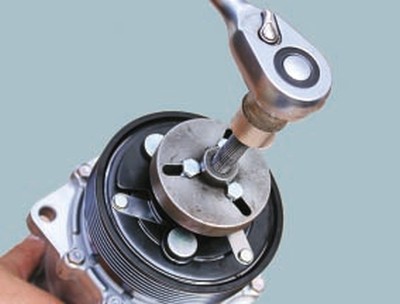
Okay, let’s dive into the Chery Tiggo T11 air conditioning system. First up, the compressor. This is the heart of your AC, the component that actually pumps the refrigerant around the system. Now, there are a few things you need to know about the Chery Tiggo T11’s compressor. Firstly, finding the correct part number is crucial. You don’t want to end up with a compressor that’s incompatible with your system. I’ll show you exactly where to find that part number, both on the compressor itself and in your owner’s manual. We’ll also talk about common failure points – things like worn bearings, seized pistons, or leaks in the seals. Diagnosing a bad compressor can be tricky, but I’ll walk you through some telltale signs, like unusual noises, lack of cooling, or even a complete lack of refrigerant. We’ll cover how to check the compressor clutch engagement too, a simple test that can often pinpoint the problem. Remember, replacing a compressor is a fairly involved job, so if you’re not comfortable working on your car’s AC system, it’s best to take it to a professional.
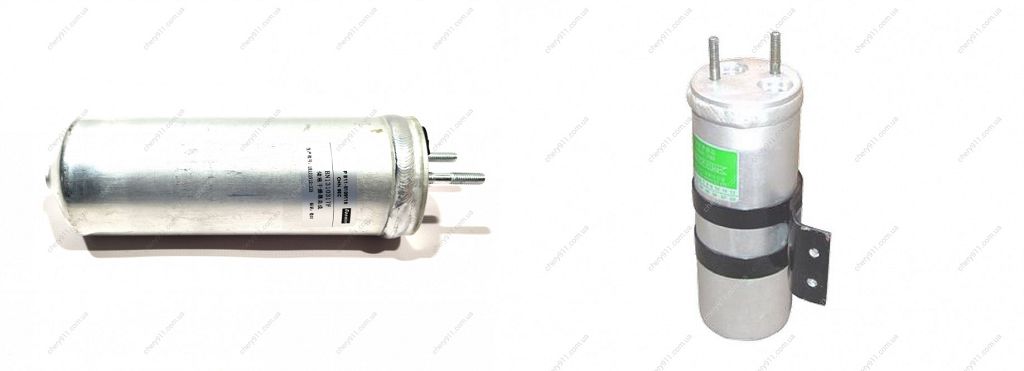
Next, let’s talk about the air conditioner dryer. This little component plays a HUGE role in the health of your entire AC system. It’s essentially a filter that removes moisture and contaminants from the refrigerant. Why is this important? Moisture can cause serious damage to the compressor and other components, leading to expensive repairs down the line. We’ll look at how to identify the dryer on your Chery Tiggo T11, and I’ll show you what a healthy dryer looks like compared to one that needs replacing. Remember, the dryer is a relatively inexpensive part, but neglecting it can cost you a fortune in the long run. We’ll also discuss the part number for the dryer, so you can easily source a replacement if needed.
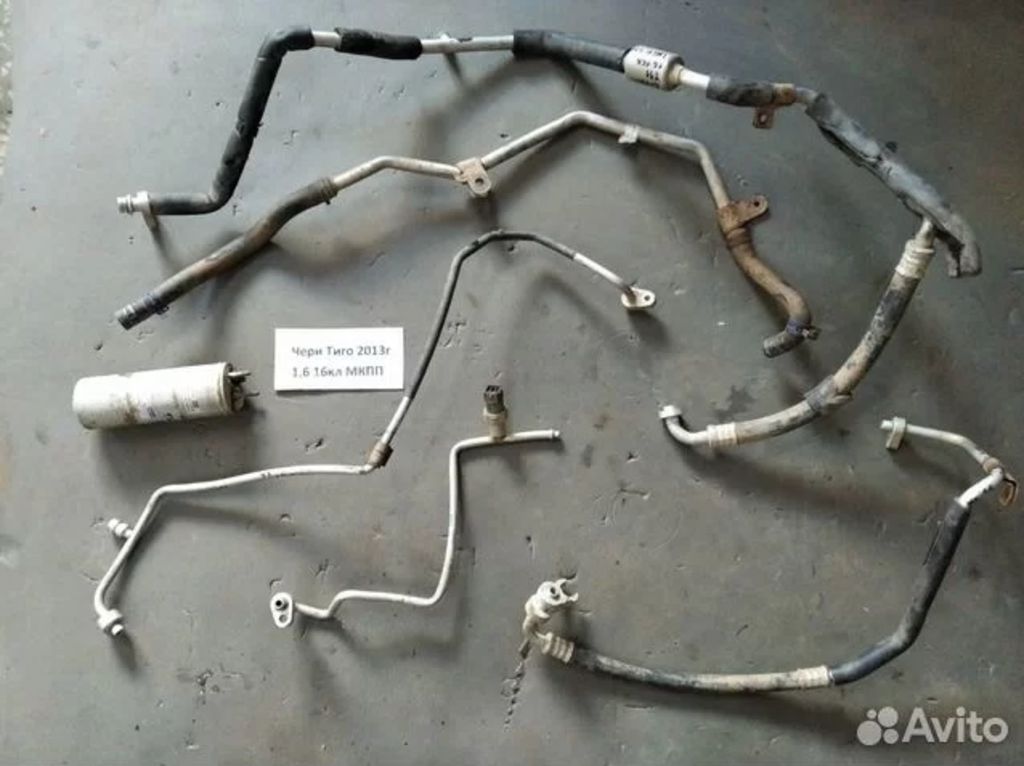
Now, let’s move on to the air conditioning pipes. These are the arteries of your AC system, carrying the refrigerant between the various components. These pipes are under high pressure, so it’s crucial to handle them carefully. We’ll go over the different types of pipes used in the Chery Tiggo T11’s AC system, and I’ll show you how to identify potential leaks. Leaks can be tricky to spot, but I’ll share some tips and tricks to help you find even the smallest ones. We’ll also discuss the importance of using the correct refrigerant when repairing or recharging your system. Using the wrong refrigerant can damage your components and void your warranty. I’ll show you how to identify the correct refrigerant type for your Chery Tiggo T11. And of course, we’ll cover the part numbers for the various pipes, just in case you need to replace any damaged sections.
Finally, let’s bring it all together and discuss the entire air conditioning system as a whole. We’ve covered the individual components, but now we’ll look at how they all work together to provide cool air. I’ll walk you through the entire refrigerant cycle, from the compressor to the evaporator and back again. Understanding this process will help you diagnose problems more effectively. We’ll also discuss common issues that can affect the entire system, such as low refrigerant levels, electrical problems, or blockages in the system. We’ll cover some basic troubleshooting steps you can take to identify the source of the problem. And remember, if you’re not comfortable working on your car’s AC system, it’s always best to seek professional help. A poorly repaired AC system can lead to further damage and costly repairs down the line.
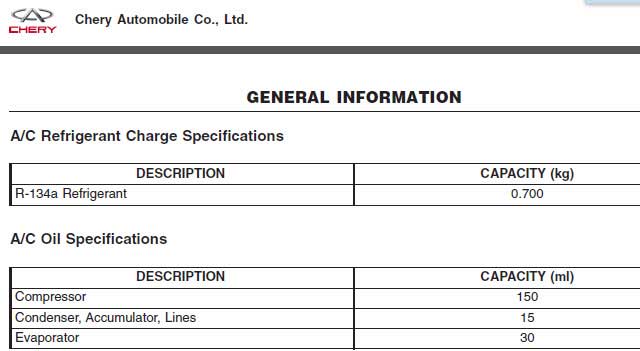
Okay, let’s dive straight into the Chery Tiggo T11 air conditioning system. First up, we need to talk about the refrigerant and oil. Getting the right amounts is crucial for efficient and reliable operation. For your Tiggo T11, you’ll need to find the exact specifications in your owner’s manual – it’s vital to use the manufacturer’s recommended type and quantity of refrigerant, usually R-ONE-THREE-FOUR-A, and the correct PAG oil. Don’t guess on this; using the wrong type or amount can seriously damage your compressor. I’ve seen it happen, and it’s not cheap to fix. The manual will specify the exact amounts, but typically, you’re looking at somewhere between SIX HUNDRED and EIGHT HUNDRED grams of refrigerant, depending on the system’s size and configuration. Always double-check your manual!
Now, let’s get into some common air conditioning problems. One of the most frequent issues is a complete lack of cold air. This could be due to several things. First, check your refrigerant levels. Low refrigerant is a very common cause. You might have a leak somewhere in the system, which we’ll discuss in a moment. Another possibility is a faulty compressor. The compressor is the heart of your AC system, and if it’s not working, you won’t get any cold air. You might hear unusual noises coming from the compressor, like a grinding or rattling sound, which is a clear indication of a problem. We’ll cover diagnosing and replacing the compressor later in the video. A malfunctioning condenser fan, or even a completely seized compressor clutch, can also lead to a lack of cold air. Always start with the simplest checks – refrigerant levels and fan operation – before moving on to more complex components.
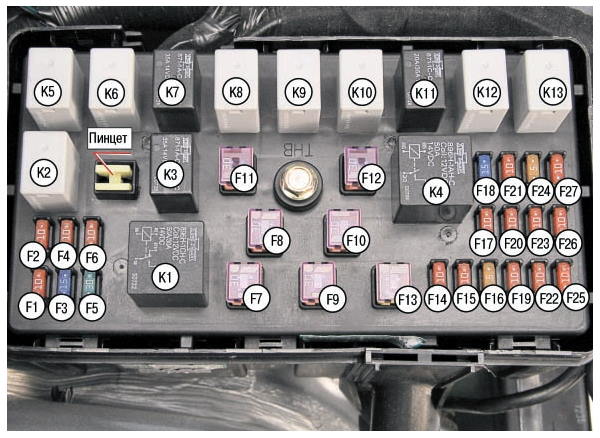
Next, let’s talk about that second radiator fan. On the Tiggo T11, this fan plays a vital role in cooling the condenser, which is essential for efficient air conditioning. If this fan isn’t working, your AC system will struggle to cool the air effectively, leading to warm air blowing from the vents. The most common cause is a faulty fan motor or a blown fuse. Check your fuse box first – it’s a simple and quick check that could save you a lot of time and effort. If the fuse is fine, then the fan motor itself might be the culprit. Testing the motor’s voltage and current draw will help determine if it’s functioning correctly. Replacing the fan motor is usually a straightforward job, but you’ll need to disconnect the electrical connector and possibly remove some shrouding to access it.
Freon leaks are a significant problem. Finding the source of a leak can be tricky, but it’s crucial to fix it. A small leak might only gradually reduce your refrigerant levels, leading to less efficient cooling. A larger leak, however, can quickly deplete the refrigerant, rendering your AC system completely useless. To find a leak, you can use a leak detection dye or an electronic leak detector. These tools can help pinpoint the exact location of the leak, whether it’s in a hose, the condenser, the evaporator, or even a connection point. Repairing the leak might involve replacing a hose, sealing a small hole, or even replacing a larger component. Remember, always handle refrigerant with care and follow safety precautions.
Finally, let’s address those annoying noises or the dreaded compressor pulley destruction. Unusual noises from your air conditioning system are never a good sign. A grinding or rattling sound from the compressor could indicate bearing wear or internal damage. A squealing noise might point to a problem with the compressor clutch or a belt issue. If you hear these sounds, it’s best to have the compressor inspected by a professional as soon as possible. Ignoring these noises could lead to complete compressor failure, which is a costly repair. And speaking of costly repairs, a destroyed compressor pulley is a serious issue. This usually happens due to a seized bearing within the compressor itself, leading to excessive stress on the pulley. Replacing the compressor is often the only solution in this case. Remember, regular maintenance and prompt attention to any unusual noises can help prevent these more serious and expensive problems.
- Читайте также: