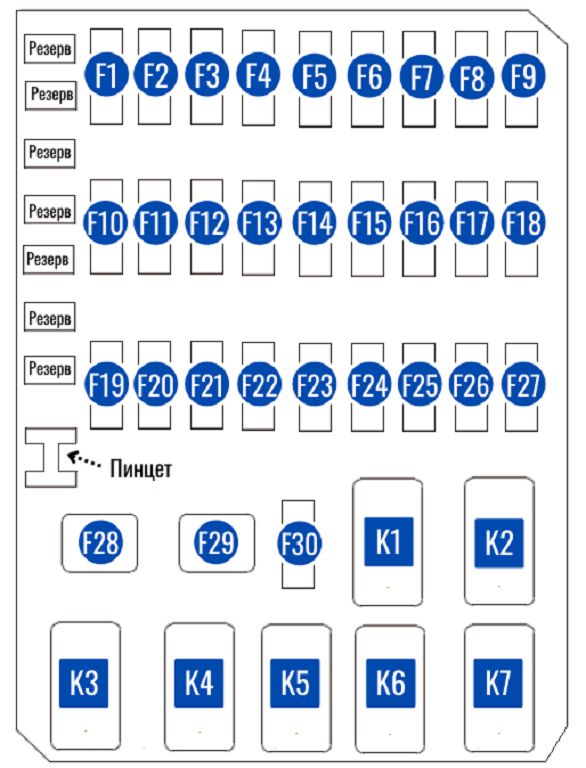
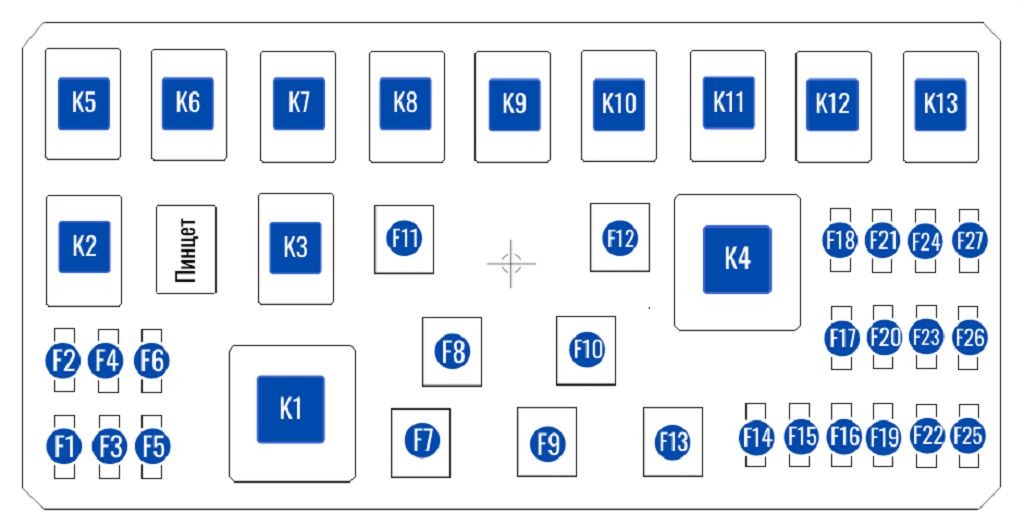
Hey everyone, let’s dive into the world of Chery Tiggo ELEVEN fuses! First things first, we’re going to look at a color-coded diagram showing all the fuse ratings. This is super important because each fuse protects a specific circuit with a specific amperage. You’ll see different colors representing different amperage ratings – for example, you might see a bright red for a high amperage fuse protecting something like your power windows, and a smaller, maybe blue or yellow fuse for something that draws less power, like your interior lights. Pay close attention to the legend on the diagram – it will clearly show you what each color corresponds to. It’s crucial to replace a blown fuse with one of the exact same rating; using a higher-rated fuse is a fire hazard, and a lower-rated one will just blow again immediately. Take your time studying this diagram; it’s your roadmap to understanding your Tiggo ELEVEN’s electrical system.
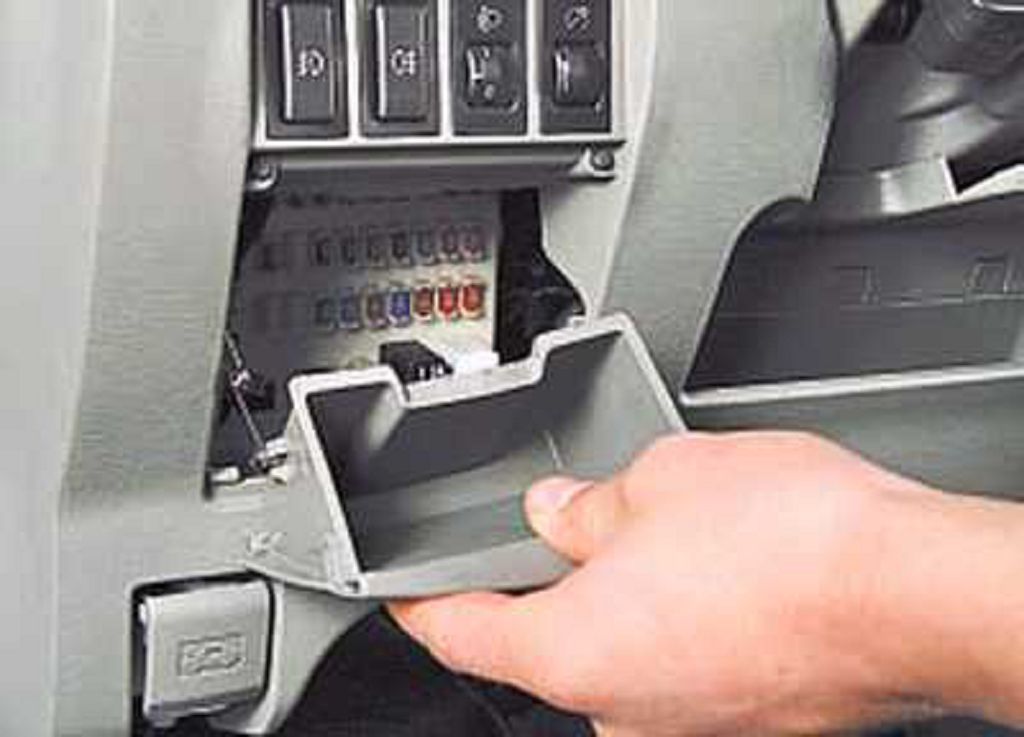
Now, let’s locate that all-important fuse box inside the passenger compartment. On most Tiggo ELEVEN models, you’ll find it tucked away neatly under the dashboard, usually on the driver’s side. Sometimes it’s behind a small access panel, so you might need to carefully pry that open. Don’t use excessive force, though! A gentle pry with a flathead screwdriver or a trim tool should do the trick. Once you’ve located the panel, you’ll see the fuse box itself. It’s usually a fairly standard-looking box with a clear cover, allowing you to see all the fuses inside. Take a good look around – sometimes there’s a small diagram printed right on the cover itself, which can be helpful in identifying which fuse is which. If not, don’t worry, we’ve already covered the detailed color-coded diagram, which will be much more comprehensive.
Remember, when you’re working with fuses, always turn off the ignition. This is a vital safety precaution to prevent any electrical shocks or short circuits. Once you’ve located the blown fuse, carefully remove it using the fuse puller tool – usually found within the fuse box itself. Again, refer to that color-coded diagram to ensure you’re replacing it with the correct amperage fuse. Once the new fuse is in place, test the circuit to make sure everything is working correctly. If the new fuse blows immediately, there’s likely a more serious underlying electrical problem, and you should consult a qualified mechanic. Don’t just keep replacing fuses; that’s a sure sign something else is wrong. Understanding your fuse box and its diagram is a great way to troubleshoot minor electrical issues yourself, but remember, safety always comes first!
Hey everyone, let’s dive into the world of Chery Tiggo 11 fuses! Knowing where your fuses are and what they protect is super important for keeping your car running smoothly. We’re going to cover the main fuse box, the auxiliary box – which is often called the ISU – and the underhood fuse box. Let’s get started!
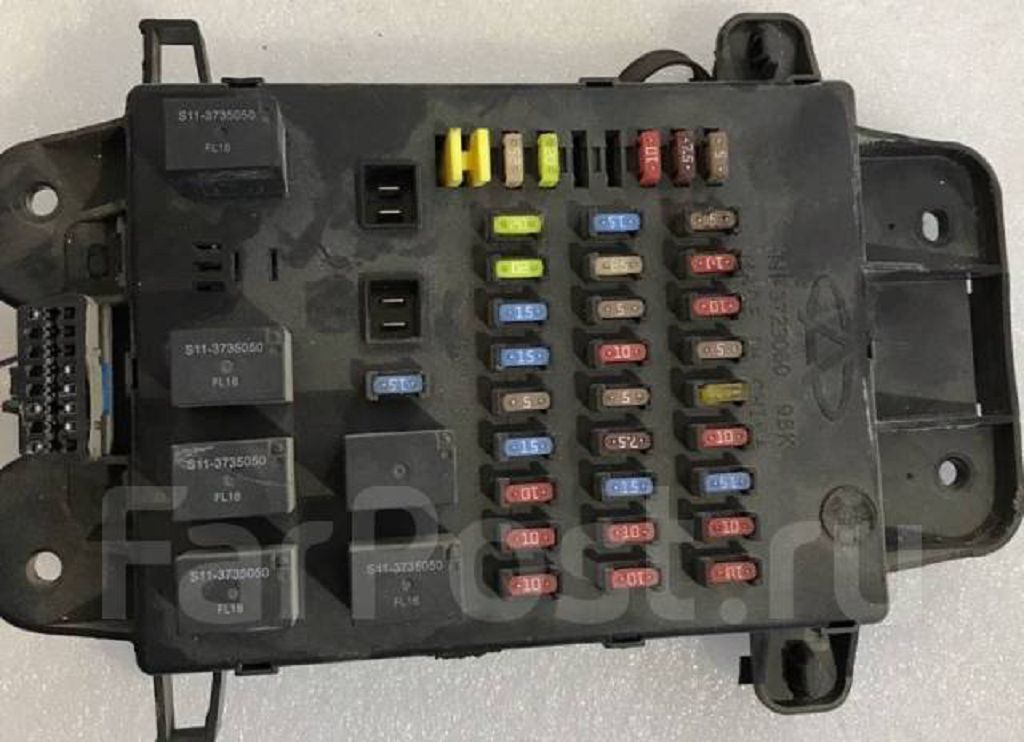
First up, the main fuse box. This is usually located inside the car, often near the steering wheel or under the dashboard. Now, finding the exact location in your Tiggo 11 might require a little bit of searching, depending on the year and trim level. Your owner’s manual is your best friend here – it’ll have a diagram showing the exact location. Once you’ve found it, you’ll see a panel or cover. Carefully remove this to access the fuses themselves. Inside, you’ll find a bunch of fuses, each protecting a different circuit in your car. These are usually color-coded, and you’ll find a fuse rating printed on each one. This rating, usually expressed in AMPERES, tells you how much current the fuse can handle before it blows. A blown fuse will look melted or broken. Replacing a blown fuse is usually pretty straightforward – just make sure you replace it with a fuse of the SAME rating. Don’t go higher, as that could damage your car’s electrical system. We’ll show you some close-up shots of the fuse box and the fuse ratings for each circuit, so you can easily identify which fuse protects what. We’ll also point out any particularly important fuses, like the ones for the headlights, power windows, or the radio. Pay close attention to these, as they’re frequently blown.
Next, let’s talk about the auxiliary fuse box, often referred to as the ISU. This box usually contains fuses for less critical circuits, but it’s still important to know where it is and how to access it. Again, your owner’s manual will be your best guide to finding its location. It might be tucked away under the dashboard, or it could be located in the engine bay. The process of accessing and replacing fuses in this box is similar to the main fuse box. We’ll show you exactly where to find it in your Tiggo 11 and what each fuse protects. Remember, always check your owner’s manual for the specific fuse ratings for your vehicle.
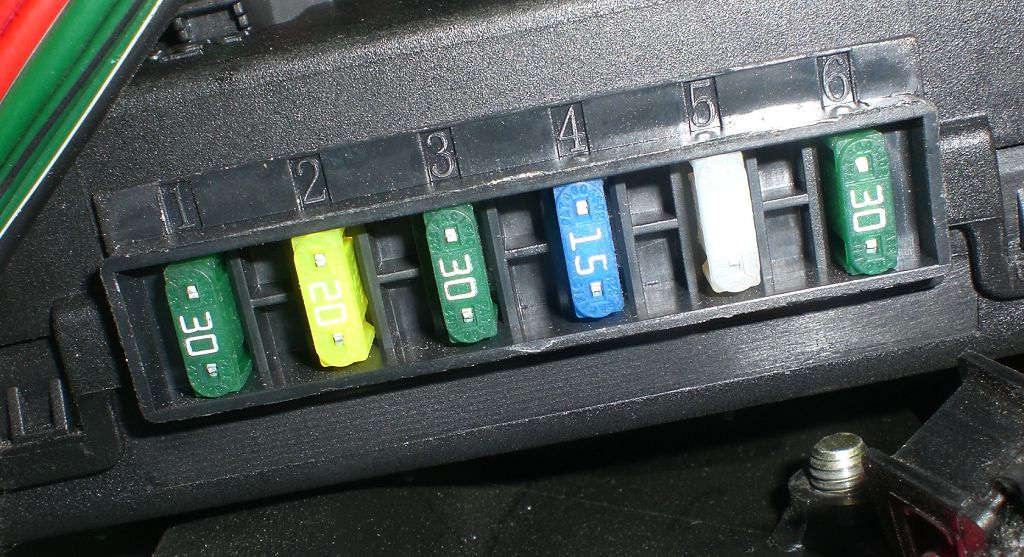
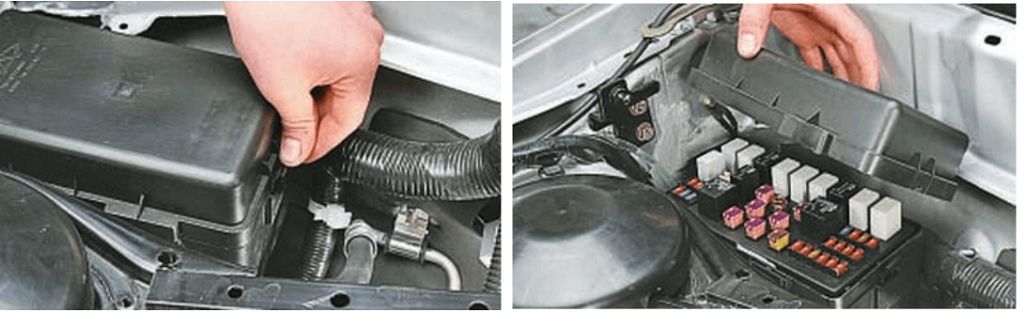
Finally, let’s look at the underhood fuse box. This box is located, as the name suggests, under the hood of your car. It usually protects circuits related to the engine and other components in the engine bay. This box often contains larger fuses, designed to handle higher currents. Again, we’ll show you exactly where it is in your Tiggo 11 and provide a detailed look at the fuse layout and ratings. Remember to always disconnect the negative battery terminal before working on any electrical components in your car, including fuses. This is a crucial safety precaution to prevent any accidental shorts or damage to your vehicle’s electrical system. We’ll show you how to safely disconnect the battery terminal in the video.
Remember, if you’re unsure about anything, always consult your owner’s manual or a qualified mechanic. And don’t forget to like and subscribe for more helpful car maintenance videos!
- Читайте также: