Hey everyone, let’s dive into the world of fuses in your Changan CS35, CS35 Plus, and the new models. Understanding your fuse box is crucial for keeping your car running smoothly, and today we’re going to break it down completely.
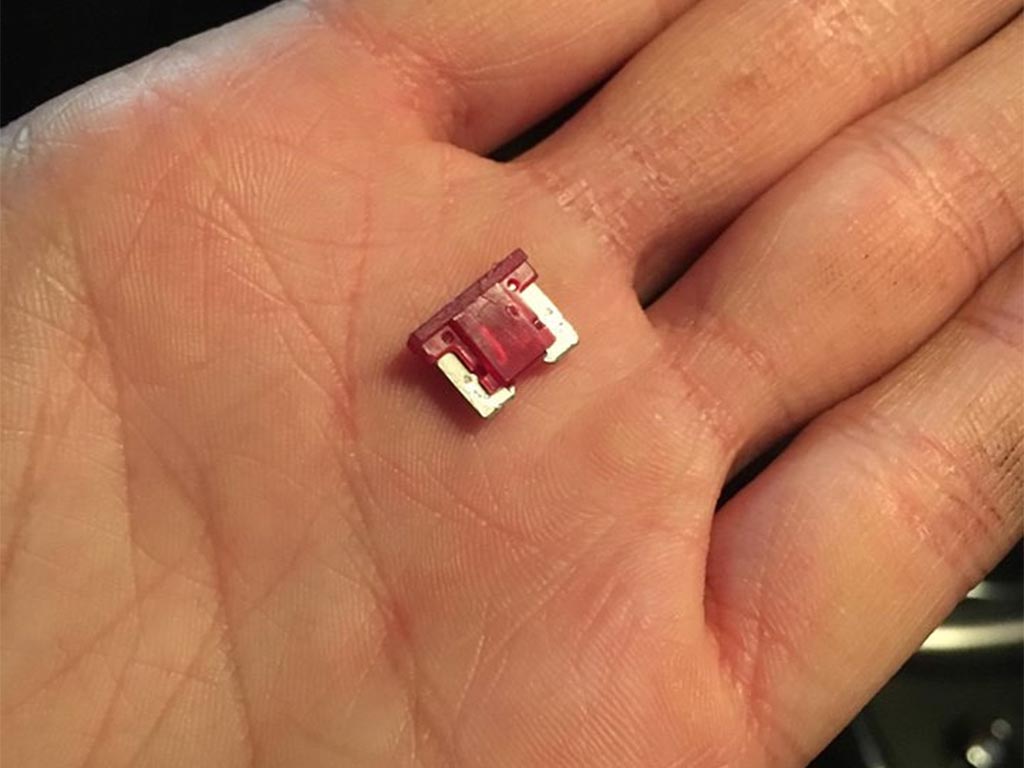
First, let’s talk about how fuses actually work. Think of them as tiny, sacrificial heroes. Each fuse protects a specific circuit in your car’s electrical system. They’re designed with a thin wire that melts and breaks the circuit if there’s a surge of electricity – preventing damage to more expensive components. This is a vital safety feature, protecting everything from your headlights to your power windows. A blown fuse is usually indicated by a broken wire inside the fuse casing – you’ll see it clearly if you look closely. Replacing a blown fuse is a simple fix, but it’s important to use the correct amperage fuse to avoid further problems. Using a higher amperage fuse can lead to overheating and even fires, so always stick to the manufacturer’s specifications.
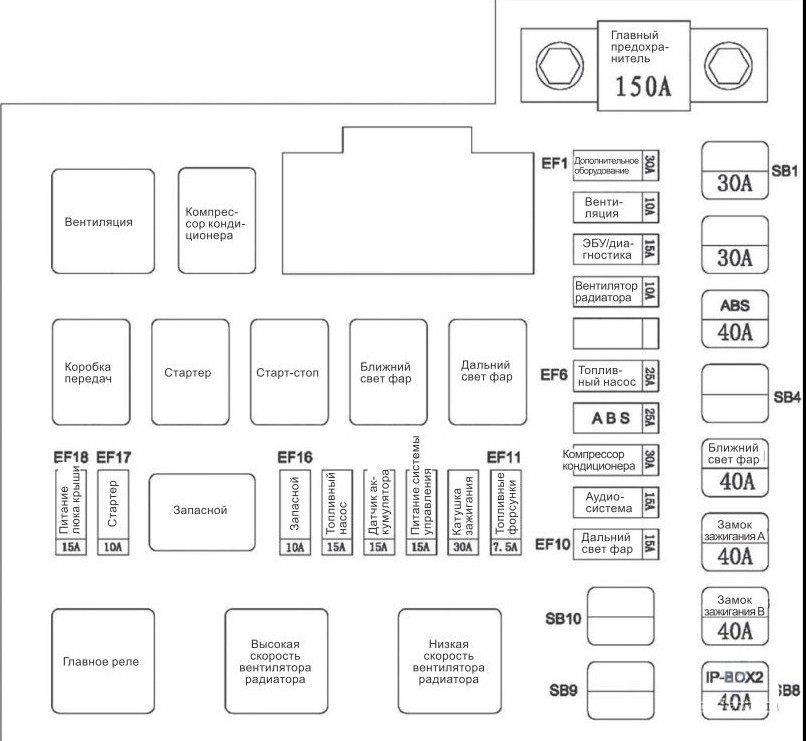
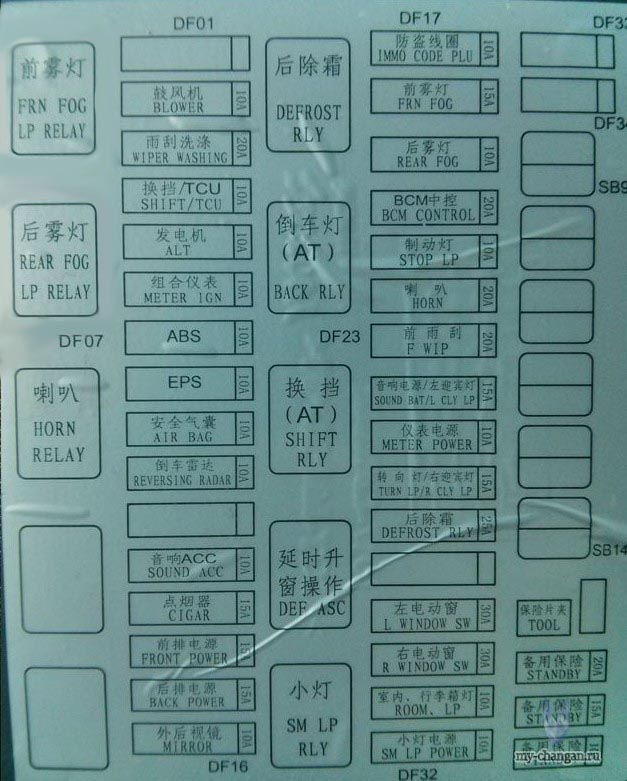
Now, let’s get visual. We’re going to look at a color-coded diagram of your fuse box. This diagram will show you the location of each fuse and its amperage rating. Remember, the amperage rating is crucial; it indicates how much current the fuse can handle before it blows. You’ll find fuses with different amperage ratings, ranging from FIVE AMPERES to THIRTY AMPERES, and even higher in some cases. The color-coding system helps you quickly identify the correct fuse. For example, a FIVE AMPERE fuse might be a specific color, while a FIFTEEN AMPERE fuse is a different color. This color-coding system is usually clearly indicated on the fuse box cover itself, and we’ll be showing you exactly what to look for in the video. Pay close attention to the legend on the cover; it’s your key to understanding the system. Don’t just rely on the color; double-check the amperage rating printed on the fuse itself to be absolutely sure.
We’ll be showing you exactly where the fuse box is located in your Changan CS35, CS35 Plus, and the new models. There might be slight variations depending on the year and model, but we’ll cover all the common locations. We’ll also provide a detailed schematic diagram, showing you exactly which fuse controls which circuit. This will be incredibly helpful if you ever need to troubleshoot a problem. For example, if your headlights aren’t working, you can quickly locate the correct fuse on the diagram and check if it’s blown. Remember, always turn off the ignition before working with fuses. It’s a simple safety precaution, but a very important one. We’ll be showing you the best way to access the fuse box and how to safely remove and replace a fuse. We’ll also show you what a blown fuse looks like, so you can easily identify it. And remember, if you’re unsure about anything, it’s always best to consult a qualified mechanic. But with this information, you’ll be well-equipped to handle most minor electrical issues yourself.
Hey everyone, let’s dive into the world of fuses for your Changan CS35, CS35 Plus, and the new models. Knowing where your fuses are and what they control is super important for troubleshooting electrical issues. We’ll be looking at the location of the fuse boxes, then we’ll get into the diagrams and tables to help you identify each fuse.
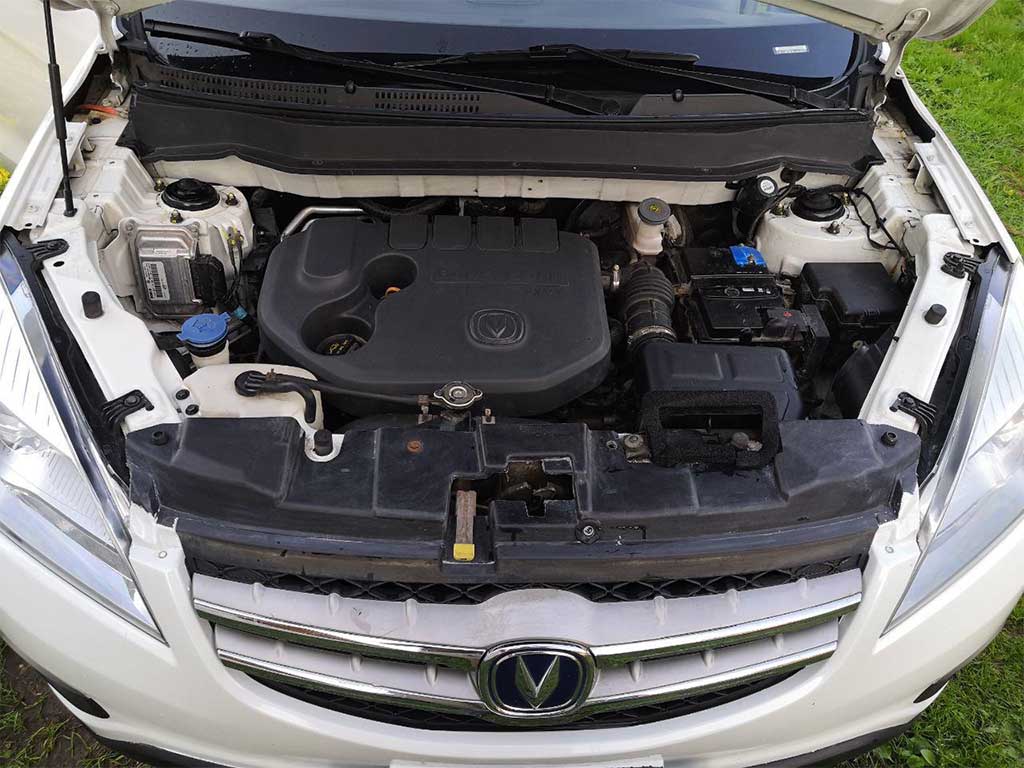
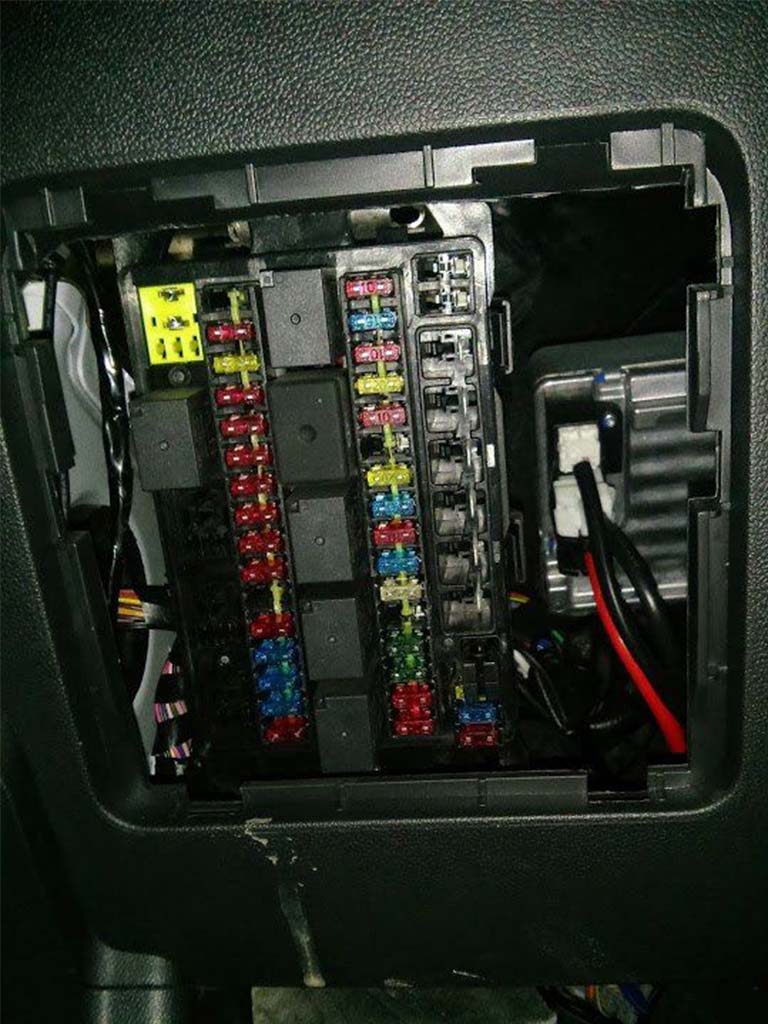
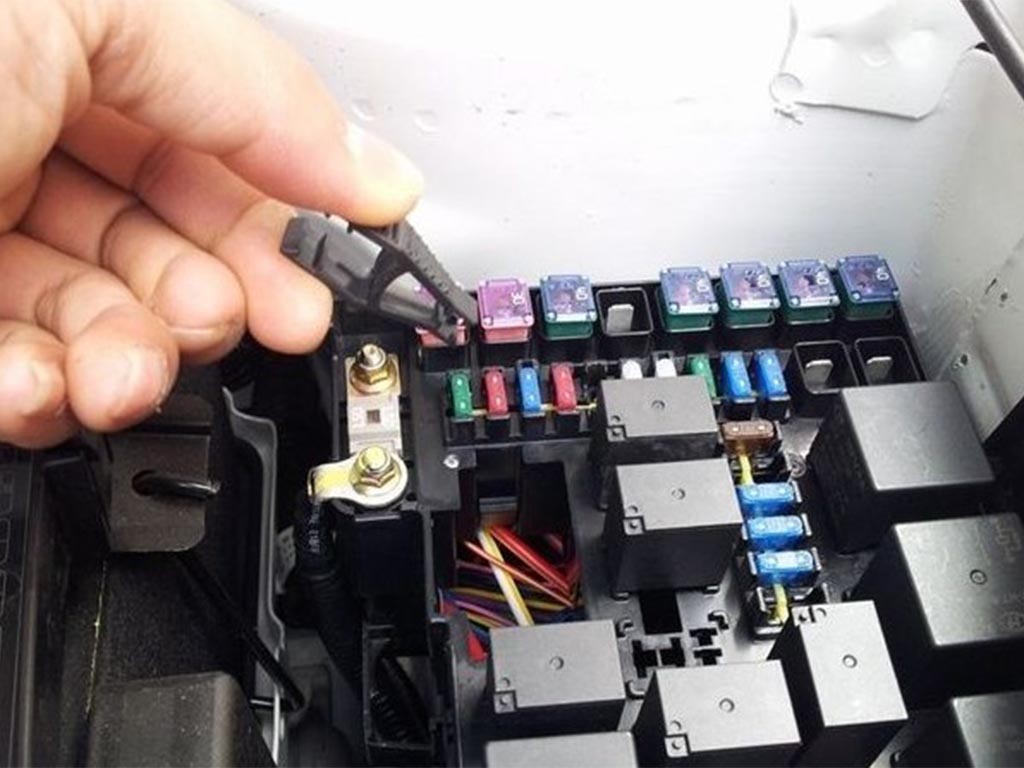
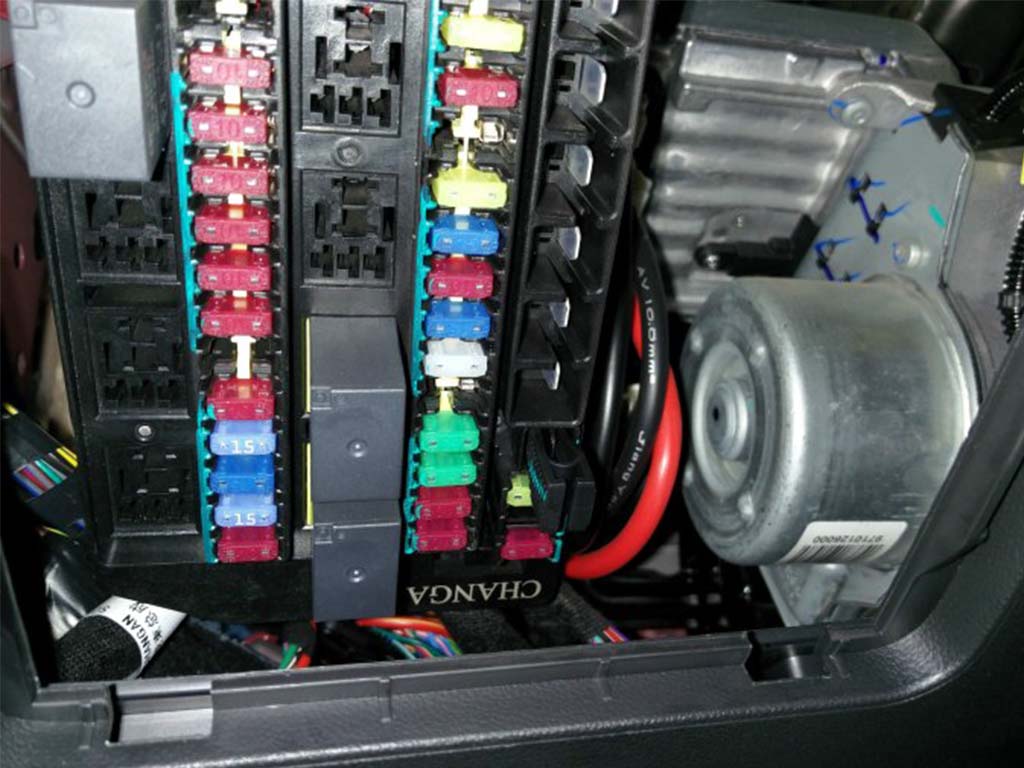
First up, let’s find those fuse boxes. Your Changan CS35, CS35 Plus, and the newer models typically have TWO main fuse boxes. ONE is usually located inside the passenger compartment, often under the dashboard. It’s usually pretty easy to spot; you might need to open a small access panel or remove a small cover. Take your time and don’t force anything. The second fuse box is generally located under the hood, near the battery. This one often contains higher-amperage fuses protecting more powerful components. I’ll show you exactly where to look for both in the video, so keep your eyes peeled. We’ll be looking at both locations in detail, showing you exactly where to find them, even highlighting any tricky spots.
Now, let’s talk about those diagrams. Once you’ve located the fuse boxes, you’ll find a diagram inside the lid of each box. These diagrams are crucial. They show you the layout of the fuses within the box, usually with a small number next to each fuse position. These numbers correspond to the numbers in the fuse assignment table, which we’ll cover next. The diagrams themselves are usually pretty straightforward, but I’ll walk you through them step-by-step in the video, pointing out any potentially confusing elements. We’ll zoom in on the diagrams for crystal-clear clarity.
Finally, let’s get to the fuse assignment tables. These tables are your best friend when it comes to identifying which fuse controls what. They usually list each fuse by number, corresponding to the numbers on the diagram, and then tell you what circuit or component that fuse protects. For example, you might see «NUMBER FIVE: Headlights,» or «NUMBER TEN: Power Windows.» These tables are essential for diagnosing problems. If your headlights aren’t working, you can quickly check fuse NUMBER FIVE to see if it’s blown. I’ll be going through several examples in the video, showing you how to interpret these tables and how to use them to troubleshoot common electrical issues. We’ll even cover some of the more unusual components and what fuses protect them. Remember, always check your owner’s manual for the most up-to-date and accurate information specific to your vehicle’s year and model. And don’t forget to replace blown fuses with fuses of the correct amperage. Using the wrong amperage fuse can cause further damage to your vehicle’s electrical system.
- Читайте также: