Hey everyone, let’s dive into the world of Chery Tiggo EIGHT/Pro/Max brake pads. We’re going to cover everything from identifying the original parts to finding suitable alternatives and, of course, showing you how to replace them. It’s a pretty straightforward process, but getting the right parts is key.
First things first, let’s talk about those original brake pad catalog numbers. This is crucial information, because using the correct part number ensures you get the perfect fit for your Tiggo EIGHT, Pro, or Max. For the front pads, you’ll typically find a number similar to, let’s say, AB-ONE-TWO-THREE-FOUR-FIVE-SIX-SEVEN-EIGHT-NINE-ZERO (this is just an example, of course; you’ll need to check your owner’s manual or a reputable parts supplier for the exact numbers for your specific model and year). Now, this number might vary slightly depending on the year of manufacture and any specific options your vehicle has, so double-checking is always a good idea. Don’t just rely on online forums; always confirm with a dealer or a trusted parts supplier. They can cross-reference your VIN number to ensure you get the perfect match. This is especially important for the rear pads, as the numbers can differ significantly from the front. Finding the correct rear pad catalog number is just as important as finding the right front ones. Again, consult your owner’s manual or a parts supplier for the precise number. Remember, using incorrect pads can compromise your braking performance and even lead to safety issues.
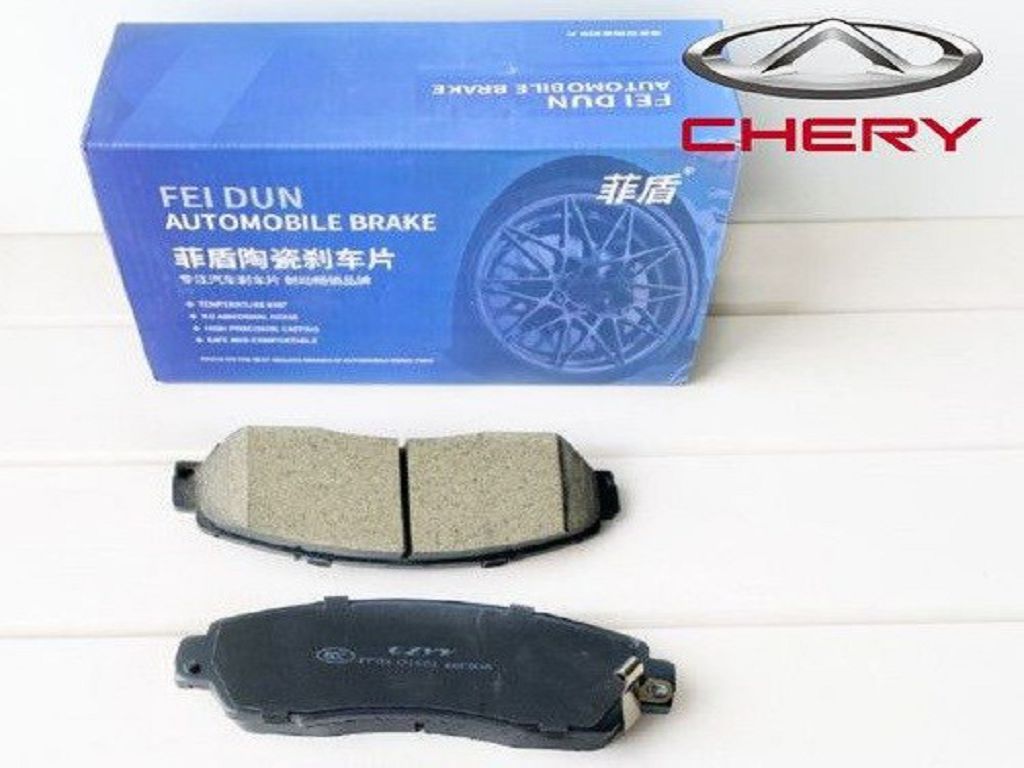
Now, let’s move on to the front pads themselves. We’ll be focusing on both the original equipment manufacturer (OEM) pads and some reputable analog options. OEM pads are, of course, designed specifically for your Chery Tiggo EIGHT/Pro/Max and offer the best possible fit and performance. However, they can sometimes be more expensive. That’s where the analog options come in. There are many high-quality aftermarket brake pads available that offer comparable performance at a more affordable price. When choosing analog pads, look for those that meet or exceed the OEM specifications. Pay close attention to the friction material, as this directly impacts braking performance and longevity. You want a material that provides good stopping power without excessive wear on your rotors. Also, check the pad’s thickness and dimensions to ensure they’re a perfect fit for your calipers. Improperly sized pads can lead to uneven wear and reduced braking efficiency. We’ll show you exactly what to look for in the video, so keep an eye out for those visual cues.
Next, we’ll tackle the rear pads. The process is very similar to the front pads, but there might be some slight differences in the procedure. Again, we’ll be comparing OEM and analog options, highlighting the key features and considerations for each. Remember, the rear pads play a crucial role in your vehicle’s braking system, so choosing the right ones is just as important as choosing the right front pads. We’ll show you how to visually inspect the pads for wear and tear, and we’ll guide you through the process of measuring the pad thickness to determine when it’s time for a replacement. Don’t wait until your pads are completely worn out; replacing them before they reach the minimum thickness is crucial for maintaining optimal braking performance and safety.
Finally, we’ll get into the replacement procedure itself. We’ll show you a step-by-step guide on how to safely and efficiently replace both the front and rear brake pads on your Chery Tiggo EIGHT/Pro/Max. We’ll cover everything from jacking up the vehicle and securing it properly to removing the wheels and calipers, and finally installing the new pads. We’ll also show you how to properly lubricate the caliper pins and slides to ensure smooth operation. Remember, safety is paramount when working on your brakes, so always follow the proper procedures and take your time. If you’re not comfortable performing this task yourself, it’s always best to take your vehicle to a qualified mechanic. But if you’re feeling confident and have the right tools, we’ll walk you through the entire process. We’ll be using clear, concise instructions and plenty of visual aids to make it easy to follow along.
Okay, let’s dive straight into those rear brake pads for your Chery Tiggo EIGHT/Pro/Max. We’re going to cover everything from identifying the original pads to finding suitable analogs and, of course, the replacement procedure itself. So, grab your tools, and let’s get started!
First up, let’s talk about the original rear brake pads. Now, these are the pads that came with your Tiggo from the factory. They’re designed to meet Chery’s specifications, and generally, they offer a good balance of performance and longevity. However, knowing what the original pads look like is crucial when you’re comparing them to aftermarket options. Pay close attention to the part number stamped on the pad itself – this is your key to finding a perfect match if you need replacements. Also, take note of the pad’s material composition and its overall wear characteristics. This will help you assess the quality of any analog you consider. Remember, taking pictures of your original pads before removal is a great idea for future reference.
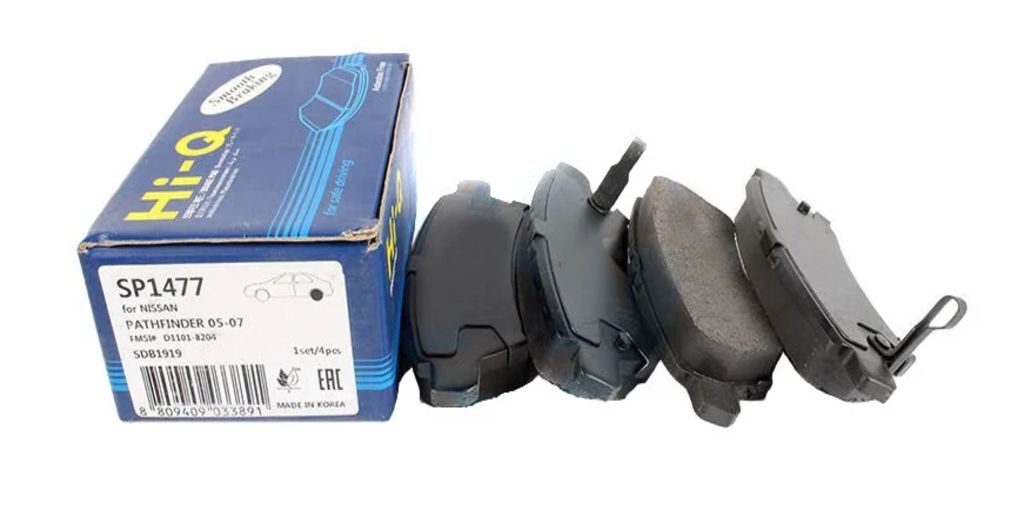
Now, let’s move on to the analogs. Finding suitable analogs for your Chery Tiggo EIGHT/Pro/Max rear brake pads can be a bit of a journey. There are a LOT of options out there, ranging in price and quality. You’ll find many brands offering pads that claim to be compatible. However, it’s crucial to do your research. Don’t just go for the cheapest option; you’re talking about your brakes here – safety is paramount! Look for reputable brands with positive reviews and ensure the pads meet or exceed the original specifications. Check the friction material, the pad thickness, and the overall dimensions. A slight variation might seem insignificant, but it could affect your braking performance and even potentially damage your brake calipers. Always double-check the part number compatibility with your specific Tiggo model – EIGHT, Pro, or Max – as there might be subtle differences.
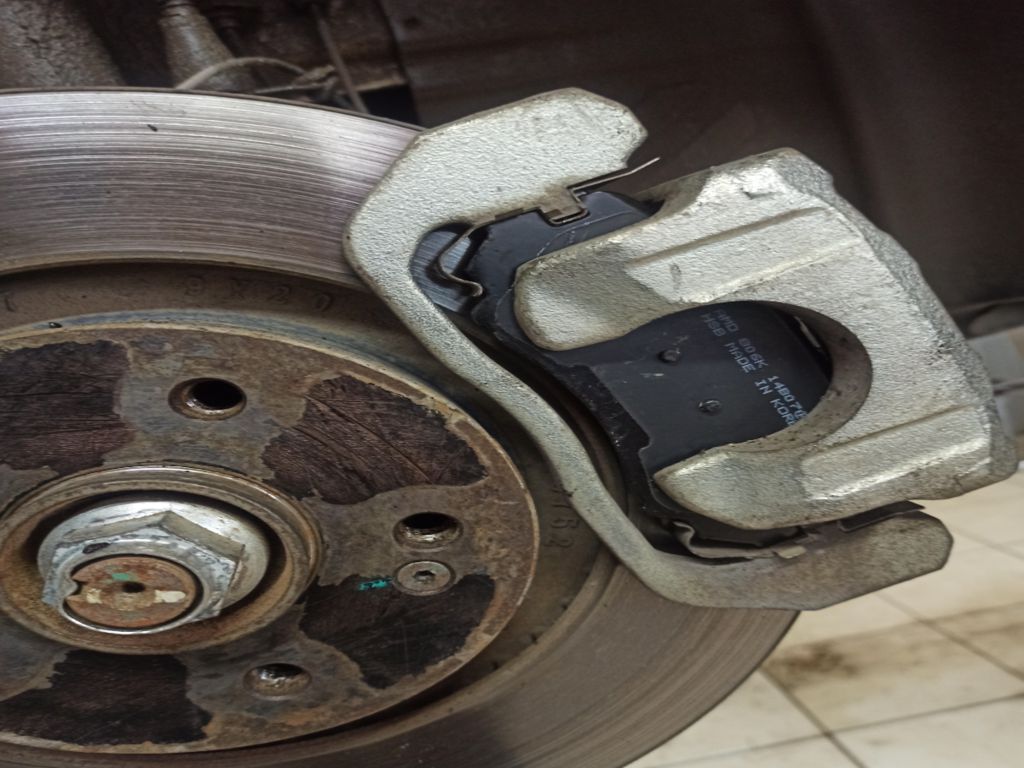
Finally, let’s get our hands dirty and tackle the replacement procedure. Before you begin, remember safety first! Always engage the parking brake firmly. Now, you’ll need a few tools: a jack, jack stands (crucial for safety!), wheel chocks, a socket wrench set, possibly a caliper piston compression tool, and of course, your new brake pads. Once your vehicle is safely secured, remove the wheel. Now, you’ll need to locate the caliper. This usually involves removing a couple of bolts or pins securing the caliper to the brake assembly. Carefully remove the caliper, being mindful not to damage the brake lines. Now, you’ll see the old brake pads. Remove them. If your caliper pistons are sticking, you might need that compression tool to push them back into the caliper housing to make room for the new pads. Once the pistons are retracted, carefully install the new brake pads, ensuring they’re seated correctly. Reassemble everything in reverse order, making sure all bolts are tightened to the manufacturer’s specifications. After reinstalling the wheel, pump the brake pedal several times to ensure the pads are making proper contact with the rotors. And finally, a test drive is essential to confirm everything is working correctly. Remember to check your brake fluid level after the replacement. If you’re not comfortable performing this procedure yourself, it’s always best to consult a professional mechanic. Your safety is the most important thing.
- Читайте также: