So, let’s dive straight into the Chery Tiggo 7 Magneto, focusing on its quality and simplicity, specifically looking at the OEM components, the firmware, and potential replacement parts.
First up, the vehicle information section. This is where things get interesting. We’re not just talking about the usual stuff you find in your owner’s manual. We’re going deep into the specifics of the Tiggo 7 Magneto’s build. Think about the source of the components – are they sourced from reputable OEM suppliers? This is crucial for long-term reliability. We’ll be examining the quality of materials used, from the plastics in the interior to the metals in the chassis. We’ll be looking at things like panel gaps, paint finish consistency, and the overall feel of the materials. Are they robust? Do they feel cheap and plasticky, or do they exude a sense of quality and durability? We’ll be comparing the Tiggo 7 Magneto’s build quality to other vehicles in its class, highlighting both its strengths and weaknesses. We’ll also be looking at the assembly process itself – are there any noticeable inconsistencies? Are the parts fitted precisely, or are there any signs of rushed workmanship? This section is all about getting a real feel for the underlying quality of the vehicle’s construction. We’ll be showing you close-up shots, highlighting both the good and the bad, so you can see for yourselves.
Next, let’s talk firmware. This is often overlooked, but it’s a critical aspect of the modern car. The Tiggo 7 Magneto’s infotainment system, its various electronic control units (ECUs), and even some aspects of the engine management system all rely on sophisticated firmware. We’ll be exploring the user experience – is the firmware intuitive and easy to use? Are there any bugs or glitches? How responsive is the system? We’ll also be looking at the potential for updates and upgrades. Can the firmware be updated over-the-air, or does it require a trip to the dealership? How frequently are updates released? And what improvements do these updates bring? We’ll be digging into the technical aspects, explaining what the firmware actually does and how it impacts the overall driving experience. We’ll also discuss the security implications of the firmware – is it secure against hacking or malware? This is a crucial aspect of modern vehicle technology, and we’ll be exploring it in detail.
Finally, let’s discuss replacement parts. This is a crucial consideration for long-term ownership. Are replacement parts readily available? Are they affordable? What’s the quality of the aftermarket parts? We’ll be looking at the availability of both OEM and aftermarket parts, comparing their prices and quality. We’ll also be discussing the potential for repairs – are there any common problems with the Tiggo 7 Magneto that require frequent repairs? What’s the cost of these repairs? And how easy are they to perform? We’ll be providing you with all the information you need to make informed decisions about maintaining your Tiggo 7 Magneto, ensuring you get the most out of your investment. We’ll be showing you examples of parts, discussing their quality, and giving you a realistic picture of what to expect when it comes to maintenance and repairs. We’ll also touch upon the warranty and what it covers. This section is all about giving you the knowledge you need to be a well-informed owner.
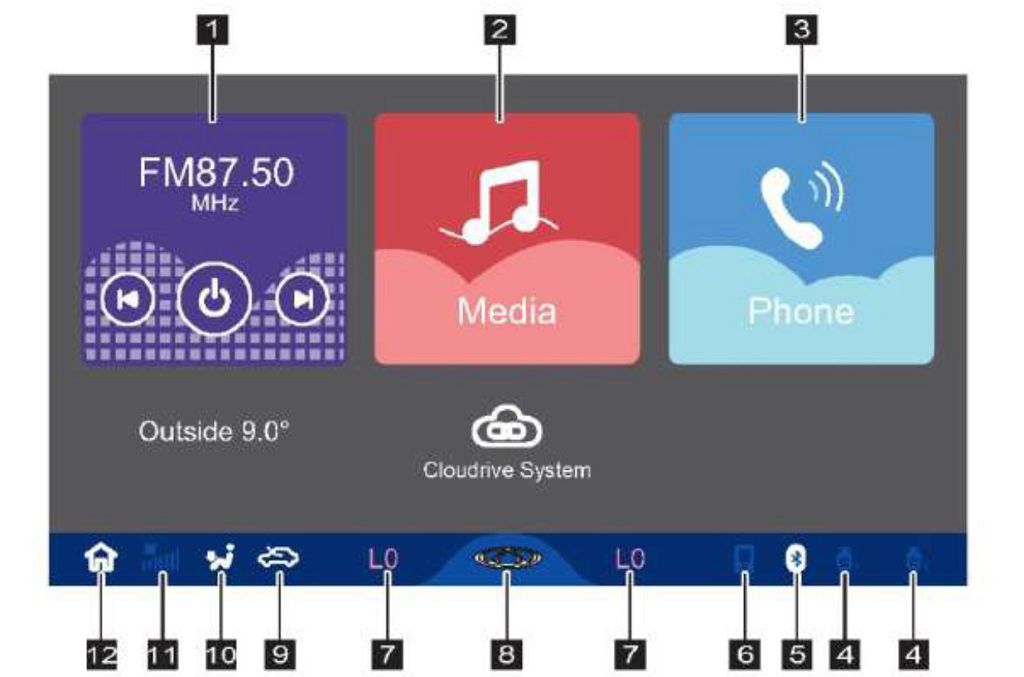
So, let’s dive right into this Chery Tiggo SEVEN Magneto head unit upgrade. We’re going to be focusing on the OEM unit, its firmware, and the whole process of replacing it. First up, let’s talk about Cloudrive. Now, Cloudrive is the operating system powering this particular stereo, and understanding its quirks is key to a smooth upgrade. It’s not your typical Android Auto setup; it has its own unique features and limitations. For instance, the way it handles updates can be a bit finicky, and sometimes you might encounter compatibility issues with certain apps. We’ll be looking at how to navigate these potential problems, and how to ensure a stable system after the upgrade. We’ll also cover some common troubleshooting steps if things don’t go exactly as planned. Remember, patience is key here – rushing the process can lead to more complications down the line. We’ll be taking a close look at the system settings, exploring the different menus, and highlighting the important configurations you’ll need to be aware of. We’ll even touch on some hidden settings that might not be immediately obvious. Understanding Cloudrive is the foundation for a successful head unit replacement.
Next, we’re tackling the firmware flashing process. This is where things get a little more technical. We’ll be walking through the steps carefully, showing you exactly how to download the correct firmware for your specific Chery Tiggo SEVEN Magneto model. Getting the wrong firmware can brick your unit, rendering it completely unusable, so precision is paramount. We’ll be using specific tools and software, and I’ll show you exactly which ones and where to find them. I’ll also explain the process in detail, breaking it down into manageable steps. We’ll cover everything from connecting your computer to the head unit to navigating the flashing software interface. We’ll also discuss potential errors you might encounter and how to troubleshoot them. Remember, always back up your current firmware before attempting to flash a new one. This is crucial for recovery in case something goes wrong. We’ll cover how to do that as well.
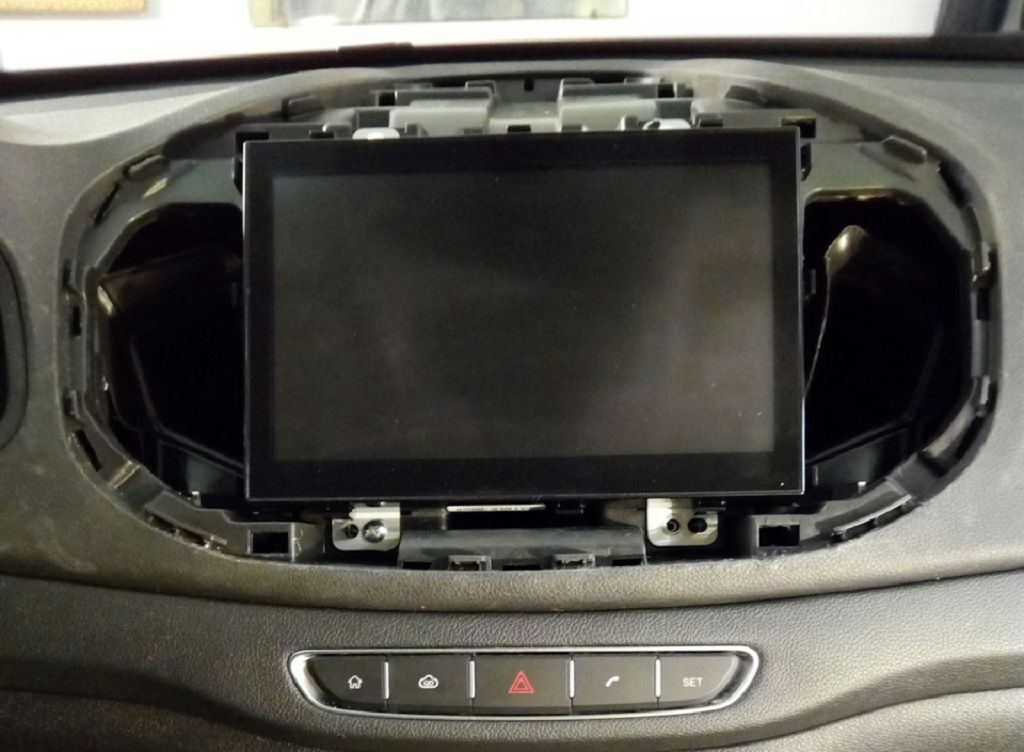
Finally, the physical removal and installation of the unit. This might seem straightforward, but there are some important steps to follow to avoid damaging your dashboard or the head unit itself. We’ll start by showing you how to safely disconnect the battery to prevent any electrical shorts. Then, we’ll carefully remove the trim pieces around the head unit, revealing the mounting brackets. I’ll show you the best tools to use for this, and we’ll take our time to avoid any scratches or damage. Once the unit is out, we’ll examine the wiring harness, showing you how to carefully disconnect each connector. This is where paying attention to detail is vital. We’ll then install the new unit, carefully connecting each wire to the correct location. We’ll double-check everything before reconnecting the battery and testing the new head unit. And finally, we’ll put everything back together, ensuring a clean and professional finish. Remember, if you’re not comfortable with this process, it’s always best to seek professional help. But if you’re feeling confident, follow along, and let’s get this done!