Okay, let’s dive right into this Geely Atlas dashboard disassembly. First up, the design and style. You know, I was really impressed with the overall look. It’s got a modern, almost minimalist feel, which I appreciate. The materials feel surprisingly high-quality for a vehicle in this price range – a nice blend of soft-touch plastics and some metallic accents that really elevate the look. The layout is intuitive, everything is where you expect it to be, which is a huge plus. There’s a nice, clean sweep across the dash, no unnecessary clutter. I particularly liked the way the infotainment screen is integrated; it’s seamlessly integrated into the design, not just slapped on as an afterthought. The subtle curves and the way the different elements flow together create a really cohesive and sophisticated look. I spent a good amount of time just admiring the aesthetics before I even started the disassembly!
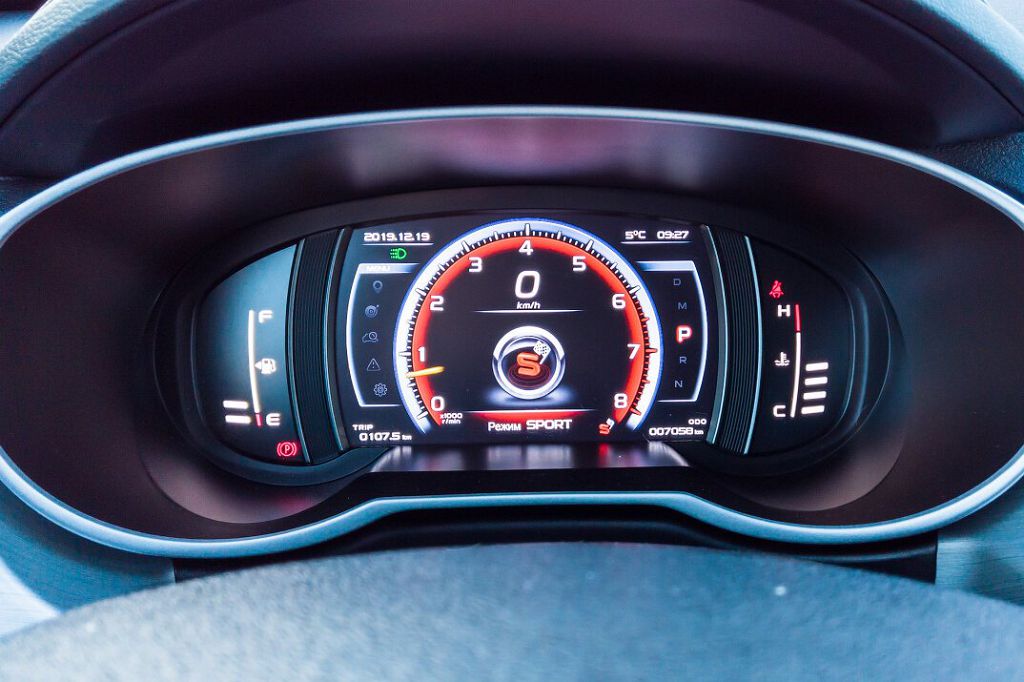
Now, let’s talk about the display modes. This is where things get interesting. The Geely Atlas boasts a really versatile infotainment system. You’ve got your standard options, of course: navigation, media playback, phone integration – all the usual suspects. But what impressed me was the level of customization. You can adjust the brightness, the color schemes, even the layout of the widgets on the screen. There are several different display modes to choose from, each offering a unique visual experience. For example, there’s a classic mode that mimics the look of traditional analog gauges, a sporty mode with a more aggressive color palette and bolder fonts, and even a night mode that reduces glare and eye strain. The graphics are crisp and clear, even in direct sunlight. The responsiveness of the touchscreen is excellent, and the menus are easy to navigate. Switching between different display modes is a breeze, and the whole system feels incredibly intuitive and user-friendly. I really appreciated the attention to detail here; it’s clear that a lot of thought went into the design of the user interface. The level of customization available is far beyond what I expected in a vehicle of this class. It’s a really impressive feature.
Okay, let’s dive right into this Geely Atlas dashboard disassembly. First up, we’re going to tackle the routing computer. Now, this isn’t just some simple box; it’s the brains of the operation, controlling everything from your navigation system to your climate control. We’ll be carefully examining its connections, tracing the wires, and showing you exactly how it integrates with the rest of the dashboard. We’ll be looking at the different types of connectors, the specific wire gauges used, and even pointing out any potential weak points or areas prone to failure. I’ll show you how to access it safely, without causing any damage, and we’ll go through the process step-by-step, so you can follow along even if you’re doing this at home. Remember, safety first! Always disconnect the battery before starting any electrical work. We’ll be paying close attention to the grounding points and ensuring everything is properly secured. This is a crucial component, so we’ll take our time and make sure to cover every detail.
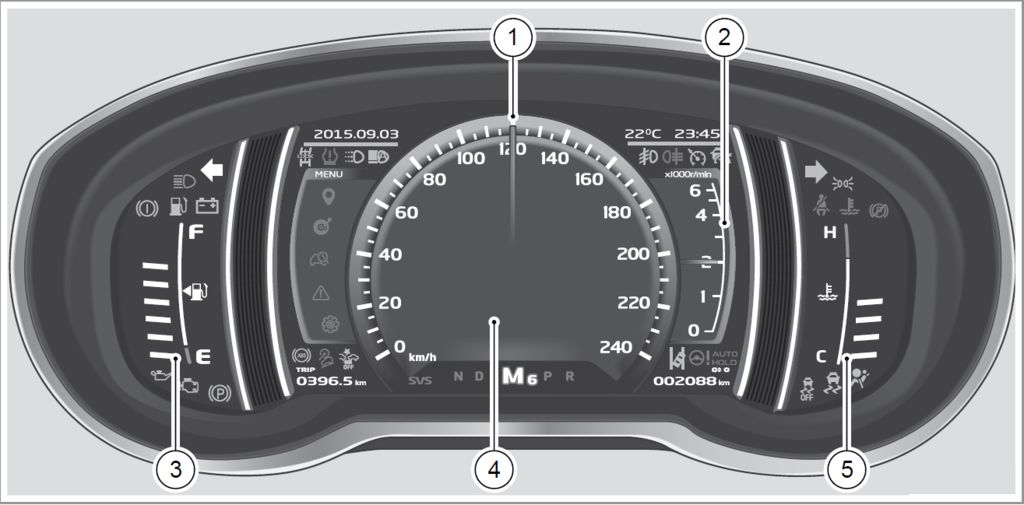
Next, we’re going to move on to checking the lamp values. This is where things get a little more technical. We’re not just talking about changing a burnt-out bulb; we’re going to be looking at the actual electrical signals that control the illumination of the various warning lights and indicators on your dashboard. We’ll be using a multimeter to measure the voltage and current flowing through each circuit. I’ll explain what each reading means and how to interpret the data. We’ll be looking for any inconsistencies or anomalies that might indicate a problem with the wiring or the control unit itself. This section is important because it can help you diagnose electrical faults and potentially save you a lot of money on repairs. We’ll cover everything from the check engine light to the low fuel warning, explaining the different codes and what they signify.
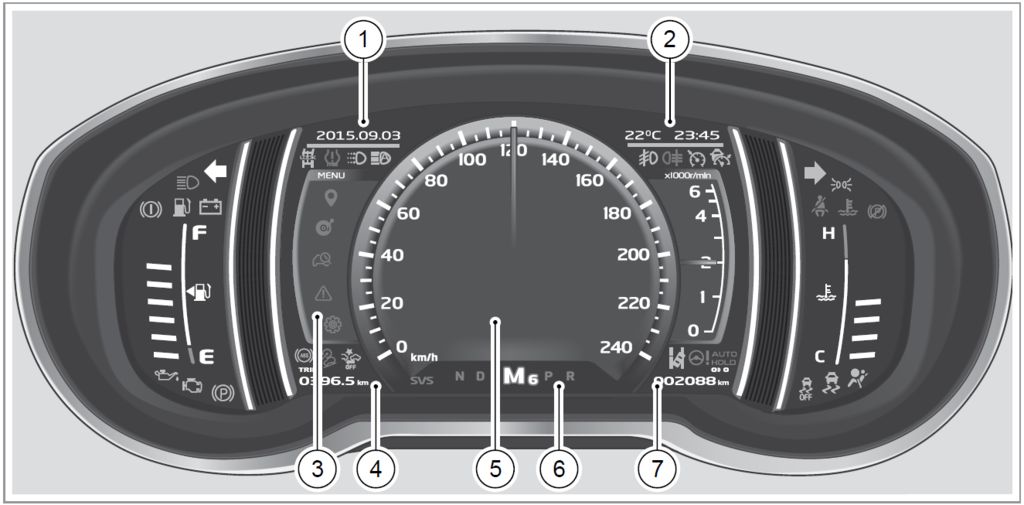
Finally, let’s talk about the cost of the digital panel. Replacing this isn’t cheap, folks. We’ll be discussing the price range you can expect to pay for a new or used digital instrument cluster for your Geely Atlas. We’ll also look at the potential cost of labor if you decide to have a professional install it. I’ll share some tips on finding the best deals and where to source replacement parts. We’ll also touch upon the potential for repairing a damaged digital panel, and whether that’s a cost-effective option compared to a full replacement. Remember, always compare prices from different suppliers before making a purchase. And don’t forget to factor in the cost of any specialized tools or equipment you might need for the installation. We’ll leave you with a good understanding of the financial implications involved in dealing with a faulty or damaged digital panel.