Hey everyone, let’s dive into the world of Geely Atlas Pro bulbs! We’re going to cover everything you need to know about the different types of bulbs in your headlights, their specifications, and how to replace them. It’s a pretty straightforward process, but having the right information beforehand makes all the difference.
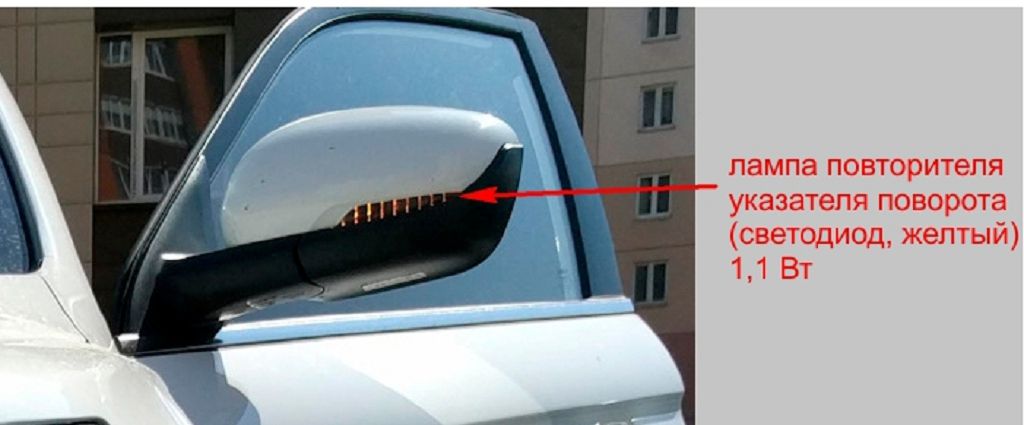
First, let’s talk about the lighting bulb specifications. Knowing this information is crucial before you even think about heading to the auto parts store. For your low beam headlights, you’ll typically find H7 bulbs. These are pretty standard, so finding replacements shouldn’t be a problem. They usually operate at around FIFTY-FIVE watts. Now, for the high beams, you’ll likely need H7 bulbs as well. Again, these are common and readily available, and they also run at around FIFTY-FIVE watts. Your parking lights, those little guys on the side, usually use a W5W bulb. These are much smaller and lower wattage, typically FIVE watts. Finally, for your stop lights, you’ll need to check your specific model year, as there can be some variation. However, common options include P21/5W bulbs. These are a bit brighter than the parking lights, operating at around TWENTY-ONE watts. Remember to always double-check your owner’s manual to confirm the exact specifications for your particular Geely Atlas Pro. It’s the best way to ensure you get the correct bulbs.
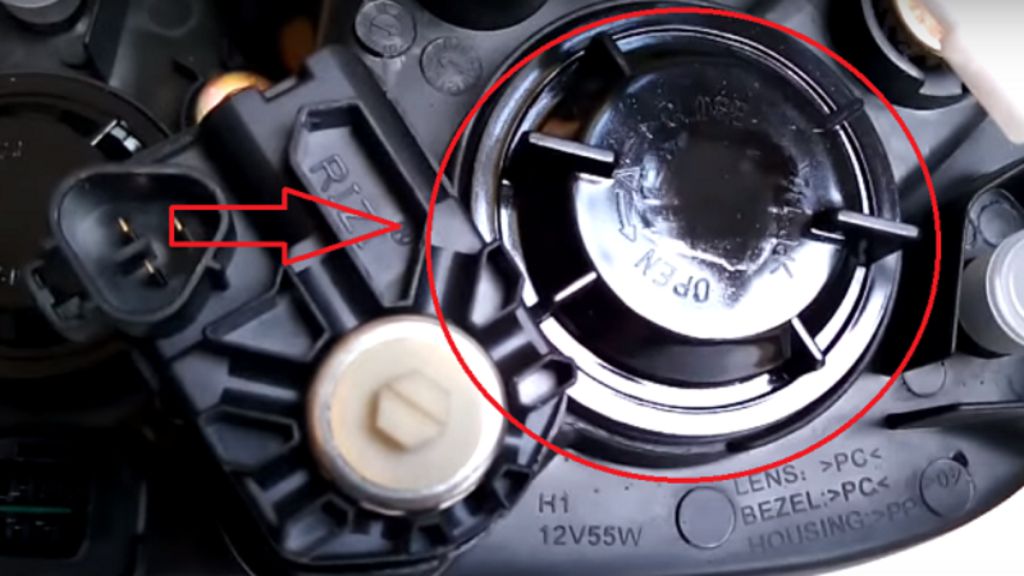
Now, let’s get into the actual replacement process. We’ll focus on replacing the bulbs in the front headlamps. Before you start, make sure your car is parked securely on a level surface, the engine is off, and the parking brake is engaged. Safety first, people! For the low and high beam bulbs, you’ll usually need to access them from behind the headlamp assembly. This often involves removing a cover or accessing a panel in the engine bay. Consult your owner’s manual for the precise steps, as it varies slightly depending on the year and trim level of your Atlas Pro. Once you have access, carefully disconnect the electrical connector from the old bulb. Then, gently twist and pull out the old bulb. Make sure you don’t touch the glass part of the new bulb with your bare hands, as the oils from your skin can shorten its lifespan. Use a clean cloth or glove if necessary. Insert the new bulb, making sure it’s securely seated, and reconnect the electrical connector. Repeat this process for both the low and high beams.
Replacing the parking and stop lights is generally a bit easier. Usually, you can access these from the rear of the vehicle. Again, your owner’s manual will be your best friend here, providing detailed instructions and diagrams. The process is similar to replacing the headlamp bulbs: disconnect the connector, remove the old bulb, carefully insert the new one, and reconnect the connector. Remember to always double-check that everything is properly connected and functioning correctly before you hit the road. And that’s it! You’ve successfully replaced your Geely Atlas Pro bulbs. Remember, if you’re not comfortable doing this yourself, it’s always best to take your car to a qualified mechanic. But hopefully, this video has given you the confidence and knowledge to tackle this task yourself.
Okay, let’s dive right into replacing those bulbs on your Geely Atlas Pro. First up, we’re tackling the rear combination lamps. Now, these are usually a bit fiddly, but with a little patience, it’s totally doable. You’ll likely need a small flathead screwdriver or a trim tool to carefully pry open the lamp housing. Don’t force anything; you want to avoid breaking any clips. Once you’ve got the housing open, you’ll see the various bulbs. The most common ones are the brake lights, turn signals, reverse lights, and tail lights. Each bulb will have a specific socket type, so make sure you get the correct replacement. Pay close attention to the wattage rating printed on the old bulb – you need to match that exactly. Using a higher wattage bulb can damage the wiring or even melt the housing. Once you’ve got the new bulb, carefully push it into the socket, making sure it clicks into place. Then, carefully reassemble the lamp housing, ensuring all the clips are properly seated. Test your lights to make sure everything is working correctly before moving on. Remember, safety first!
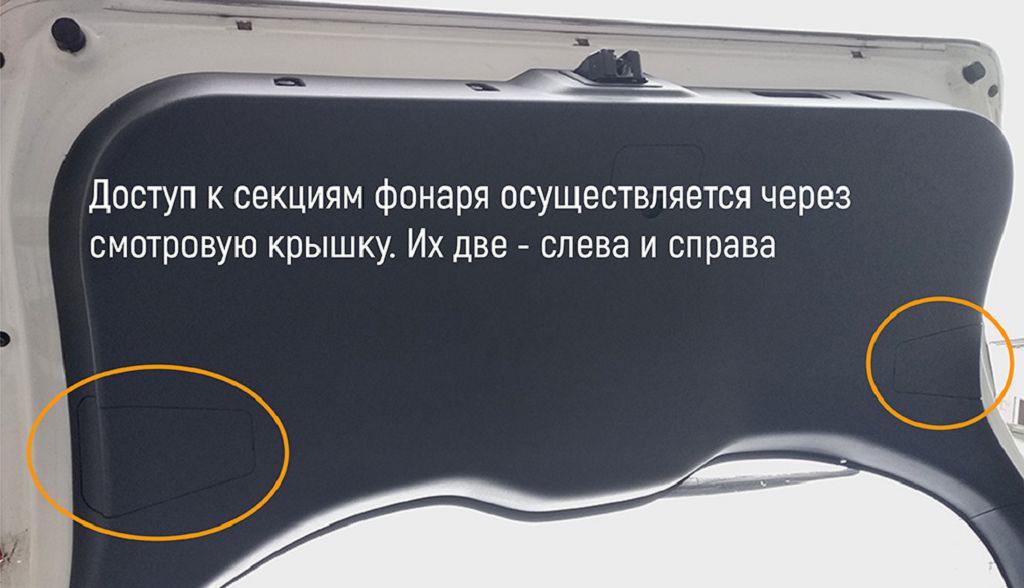
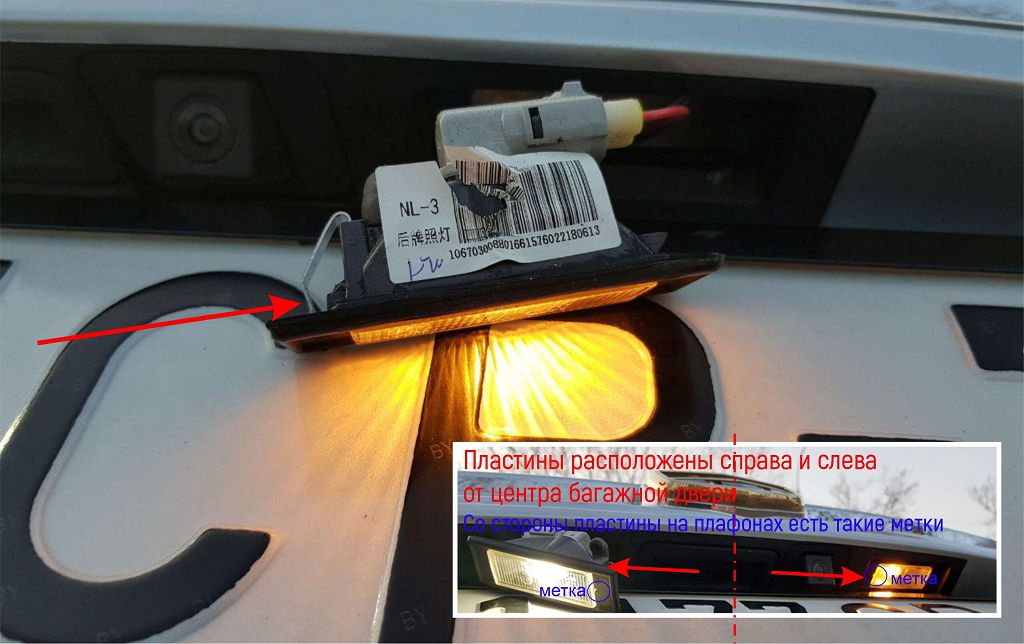
Next, let’s tackle the license plate light. This one’s usually a pretty straightforward swap. You’ll typically find a small access panel or cover on the inside of the trunk. Open that up, and you should see the bulb. Again, note the type and wattage of the bulb before removing it. The replacement process is usually as simple as twisting the old bulb out and twisting the new one in. But double-check to make sure it’s securely seated. Test the light to ensure it’s working properly before closing the access panel.
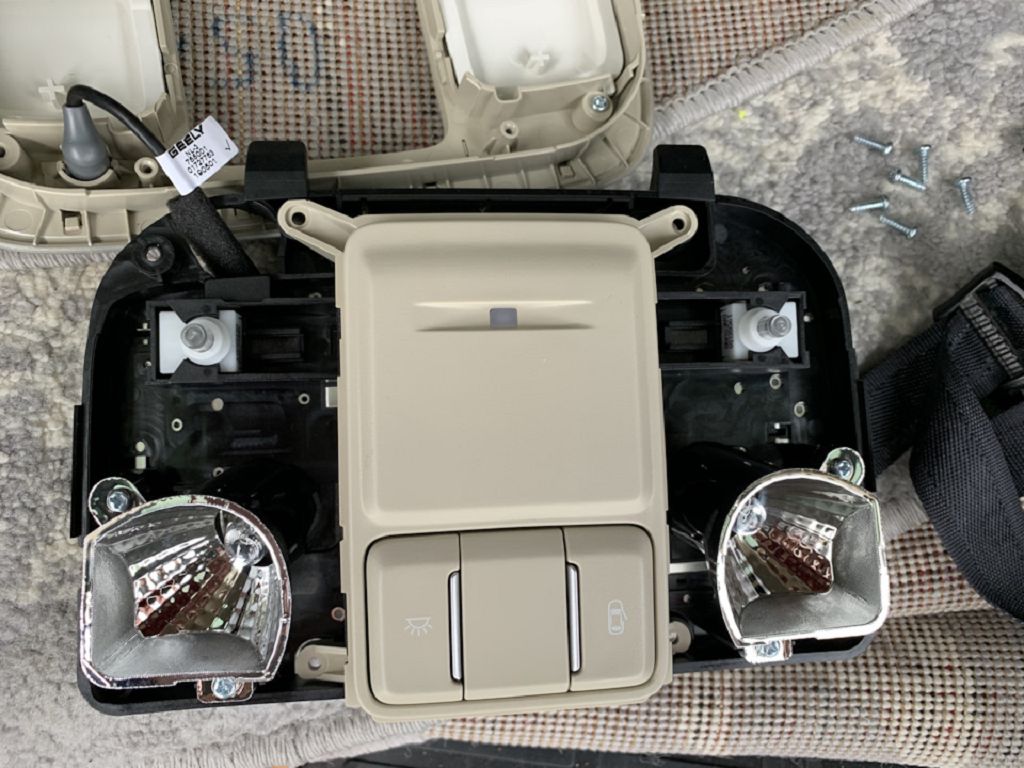
Finally, let’s look at the front passenger compartment lamps. These are usually located in the overhead console or in the map pockets on the sun visors. The process for replacing these is generally quite simple. You might need to gently pry open the lamp housing, depending on the design. Again, take note of the bulb type and wattage before removing the old one. These are often smaller bulbs, so be careful not to damage them during the removal or installation process. Once the new bulb is in place, test it to make sure it’s working correctly. And that’s it! You’ve successfully replaced several bulbs on your Geely Atlas Pro. Remember, always refer to your owner’s manual for specific instructions and diagrams if you need further assistance. And if you’re still unsure about any part of this process, it’s always best to consult a professional.